Longboarding for Beginners: 4 Techniques to Better Control Your Board
Welcome to the world of longboarding — where balance meets freedom and every ride brings a new adventure. Whether you're looking to cruise through city streets, carve down hills, or simply try something new, longboarding is one of the most rewarding and accessible ways to explore movement and flow.
Trying something new is always a mix of excitement and challenge. But don't worry — you're not alone. At Radline, we're here to guide you step-by-step, from your very first push to confident, smooth riding. With the help of this clear and beginner-friendly guide, you’ll be well on your way to mastering the basics and enjoying the ride like a pro.
So grab your board, take a deep breath, and let’s begin — your longboarding journey starts right here.
1. How to Stand and Push Off on a Longboard
Many beginners skip this step, eager to get moving — but learning how to stand and push correctly is the foundation of longboarding. A stable stance not only keeps you safe, but also sets the tone for everything you’ll do on the board.
Regular or Goofy: Know Your Stance
Your first task is to figure out which foot goes in front. This is called your stance:
- If you naturally lead with your left foot forward, you're in a regular stance.
- If your right foot leads, you're in a goofy stance.
Not sure which one feels right? Try sliding across the floor in socks — whichever foot goes forward is likely your natural lead. You can also ask someone to gently push you from behind: the foot you step forward with to catch your balance usually goes in front.

Foot Position & Balance
Once you’ve found your stance, place your front foot across the front bolts, angled slightly forward (around 45°). Your back foot stays on the ground, ready to push. Keep your knees slightly bent, your back straight, and your arms loose. Distribute your weight evenly over the board — this will help you stay balanced when you begin to move.
If you’ve done sports like snowboarding, surfing, this may feel familiar. Longboarding shares a lot with these disciplines in terms of weight shifting and body alignment. Even if you’re starting from scratch, you may be surprised how quickly your body adapts.
Starting to Push Off
Push with your back foot — a smooth, gentle motion is enough. After gaining a bit of momentum, place your back foot onto the board near the rear bolts, perpendicular to the deck. Shift your weight gently, and keep your focus forward — not at your feet.
Tip: Practice getting on and off the board on grass or carpet before trying on pavement. It helps build muscle memory with less risk.
Once you're able to push off and ride a few meters in a straight line, you’ve already taken your first major step.

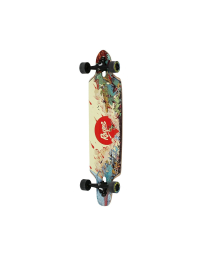
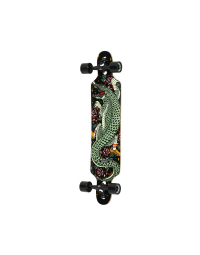
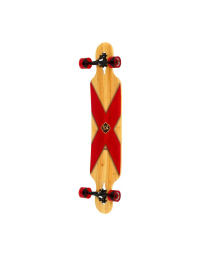
Congratulations — you’re officially longboarding! And if you're still looking for the right setup, Radline offers a range of beginner-friendly longboards to help you start strong.
2. How to Turn and Carve on Your Longboard
Once you're comfortable standing and pushing on your longboard, the next step is learning to turn — or "carve" — smoothly. Turning isn’t just about changing direction. It’s also one of the safest and most effective ways to control your speed, especially when going downhill.
How Carving Works
Turning on a longboard is all about leaning and weight shifting, not twisting your feet. Here’s how to do it:
- To turn toe-side, gently lean forward toward your toes.
- To turn heel-side, lean backward toward your heels.
Always keep your knees bent and your body relaxed — this gives you more control and absorbs bumps. Your shoulders and head should lead the movement. Wherever your eyes go, your board will follow. Avoid looking down at your feet — keep your gaze in the direction you want to go.
Tip: Practice wide “S” shapes (Carving) on flat terrain. These gentle curves help you get used to balance and board response.
Even small turns can throw you off balance at first — that’s why a helmet, the most essential protection, should be your first choice as a beginner.
3. How to Brake on a Longboard: The Foot Brake Method
Once you’re moving and turning comfortably, the next essential skill is learning how to slow down. Whether you're riding on a slight slope or just cruising around the block, being able to brake gives you control — and confidence.
The Foot Brake: Your Go-To Technique
For beginners, the most reliable method is the foot brake. While your front foot stays on the board, you gently lower your back foot flat onto the ground, using friction to reduce your speed.
- Keep your back leg slightly bent and your foot relaxed.
- Don’t stomp — apply gentle pressure.
- The smoother the contact, the more control you’ll have.
Practice this on flat, smooth pavement at low speed. Focus on balance and control before trying it on slopes.
Other Ways to Slow Down
- Carving: Making wide turns (S-curves) reduces your speed naturally.
- Sliding: (For advanced riders) We'll cover that in a future guide.
4. Stopping: Ending Your Ride Safely
Even if you’ve mastered basic control, falling is part of learning — and that’s okay. What matters most is knowing how to stop safely, especially when something feels off.
Controlled Stops
Most of the time, you’ll simply slow down using the foot brake you’ve already practiced — a smooth, gradual stop is all you need. If you're riding very slowly, stepping off gently can work too. Just avoid jumping off unless there’s no other option.
In Case of Trouble
Slopes, cracks, or unexpected speed can happen. When they do, try to stay calm and use wide turns or controlled braking to reduce speed. Never try to stop instantly — that’s when injuries happen.
And since slips and falls are almost unavoidable at the start, make sure you're protected.
At Radline, we recommend wearing solid gear — especially a helmet, knee and elbow pads — whether you're just starting out or already leveling up.